Introduction
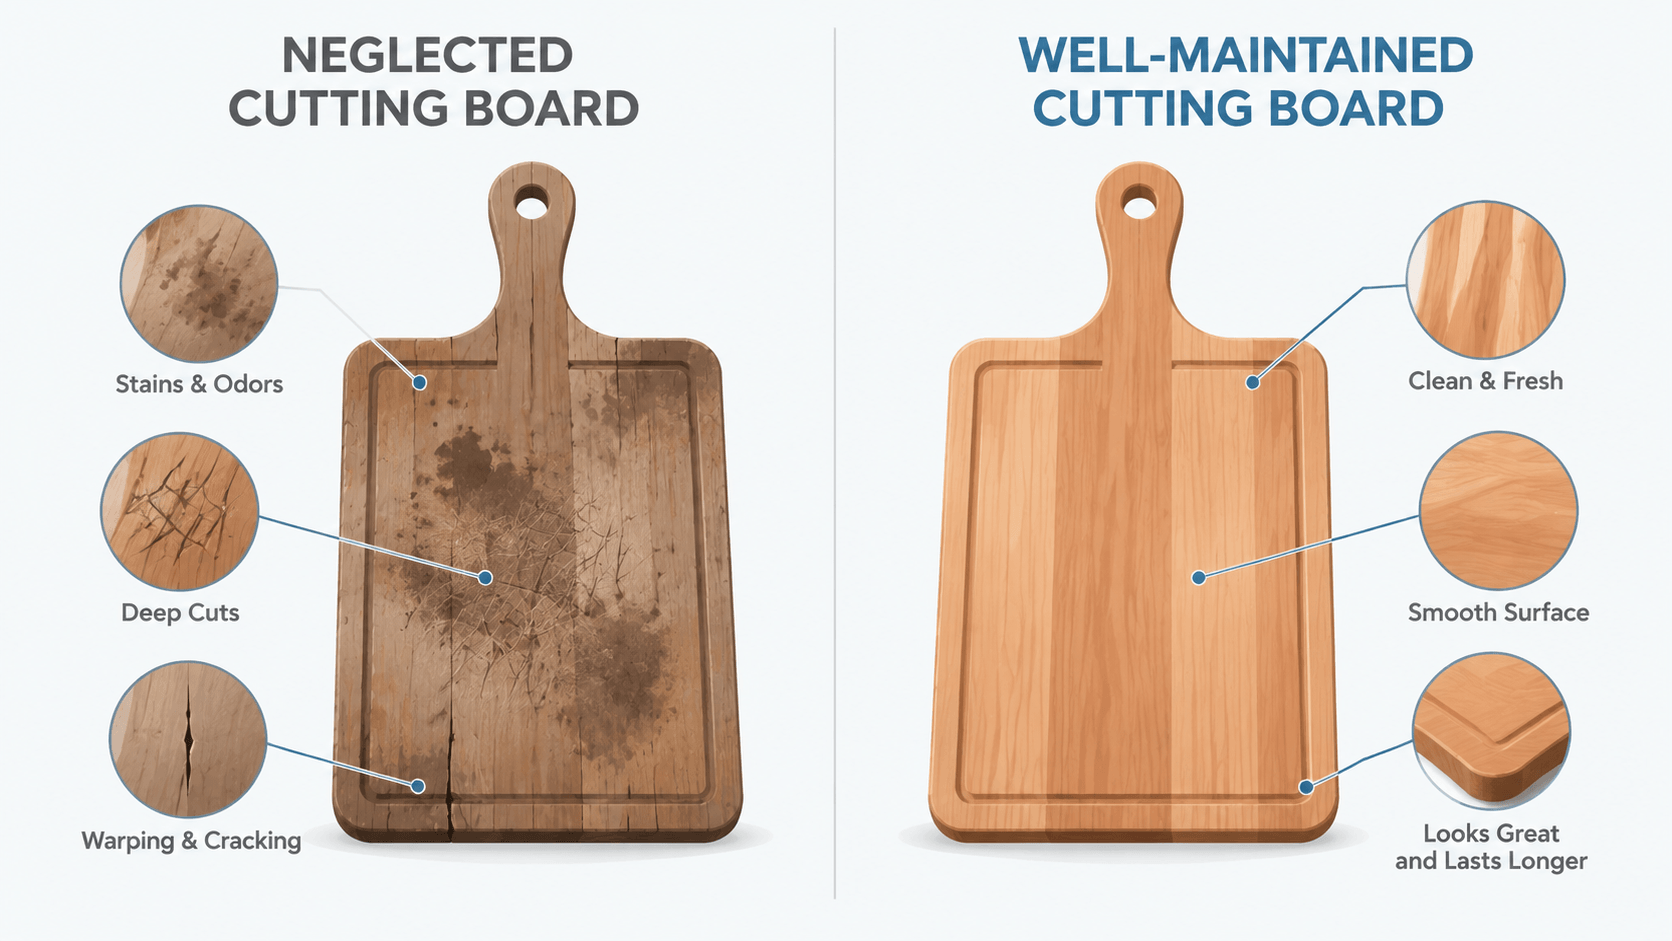
Cleaning and caring for your wood cutting board isn’t very hard, but it is very rewarding. If you take proper care of such a board, you can make it last longer and stay gentle on your knives. If you don’t, it can become a health hazard. It can also get damaged fairly quickly.
Importance of Cleaning and Caring for Your Wood Cutting Board
Here is a breakdown of what you gain from proper wood cutting board care, as well as what happens if you skip maintenance.
What You Gain from Proper Care:
- Longer lifespan: A board that’s oiled, dried, and stored correctly can last 10+ years instead of cracking apart in two.
- Better hygiene: Regular cleaning and sanitizing prevent bacteria from setting up shop in grooves and porous wood fibers.
- Smoother cutting surface: Consistent oiling keeps the wood from drying out, which means fewer splinters and a surface that’s easier on your knives.
- No lingering smells: Garlic, onion, and fish odors don’t stick around when you clean and treat the board properly.
- Maintains its look: Oiling brings out the wood’s natural grain and color, keeping it from looking dull, gray, or worn out.
What Happens When You Skip Maintenance:
- Bacteria growth: Deep cuts and untreated wood create perfect hiding spots for harmful bacteria that soap alone won’t reach.
- Warping and cracking: Boards left wet or stored improperly bend, split, and become unusable faster than you’d think.
- Absorbed stains and odors: Without a protective oil layer, the wood soaks up everything (juices, smells, discoloration), and it doesn’t come out easily.
- Dull knives: A dried-out, rough board is harder on your knife edges, meaning you’re sharpening more often.
- Wasted money: Replacing a board every year or two adds up, especially when a little care would’ve kept the original one going strong.
Wood Type Breakdown: Effects on Care and Cleaning
Different woods behave differently when it comes to maintenance. Some are naturally more resistant to moisture and bacteria, while others need more frequent oiling or are prone to staining. Knowing what your board is made of helps you adjust your care routine, so you’re not over-maintaining or, worse, under-maintaining.
Here’s how common cutting board woods stack up in terms of cleaning, durability, and upkeep needs.
| Wood Type | Hardness | Moisture Resistance | Stain Resistance | Oiling Frequency | Maintenance Notes |
|---|---|---|---|---|---|
| Maple | Hard | High | Good | Monthly | Dense grain resists bacteria well. Light color shows stains more easily, but cleans up fine with regular care. Very durable. |
| Walnut | Medium-Hard | High | Excellent | Monthly | Dark color hides stains naturally. Slightly softer than maple but still durable. Needs consistent oiling to prevent drying. |
| Cherry | Medium | Moderate | Good | Every 2-3 weeks | Darkens with age and exposure to light. More prone to dents and scratches than harder woods. Requires more frequent conditioning. |
| Teak | Hard | Excellent | Excellent | Every 6-8 weeks | Natural oils make it highly water-resistant. Requires less frequent oiling. Expensive but extremely low-maintenance. |
| Sapele | Hard | High | Excellent | Monthly | Similar to mahogany. Beautiful grain, eco-friendly, naturally resistant to moisture. Holds up well with standard care. |
| Beech | Hard | Moderate | Good | Monthly | Affordable and durable. Prone to warping if left wet. Needs thorough drying and consistent oiling to prevent cracking. |
| Oak | Hard | Low | Poor | Every 2 weeks | Open grain traps bacteria and moisture easily. Not ideal for cutting boards. Requires aggressive sanitizing and frequent oiling. |
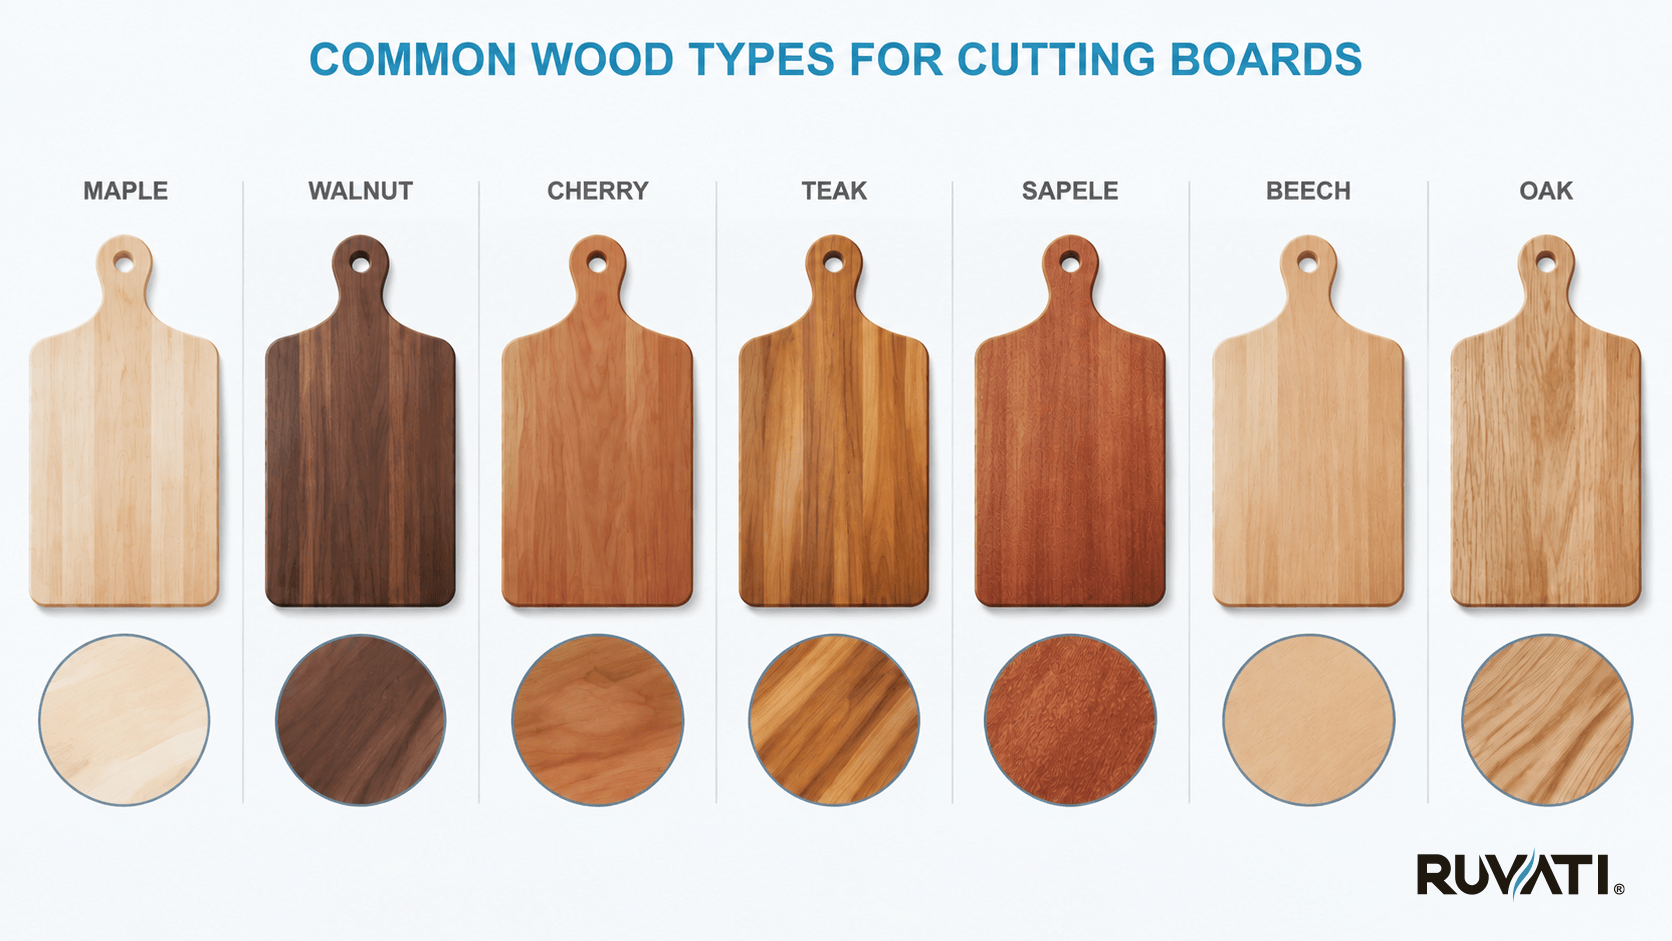
Tip: Lighter woods like maple and beech will show stains and knife marks more visibly, but that doesn’t mean they’re less hygienic. Darker woods like walnut hide wear better but still need the same level of care.
If your board is made from oak, you’ll need to stay on top of maintenance more than you would with maple or teak. Harder, denser woods generally require less fussing, but no wood is maintenance-free.
Daily Cleaning: How to Clean a Wooden Cutting Board After Each Use
Before you start scrubbing, you need to prep the board properly. Skipping this step means you’re just spreading food particles around instead of actually cleaning.
Preparing Your Board for Cleaning
Here is what you need to do to prepare your board for cleaning.
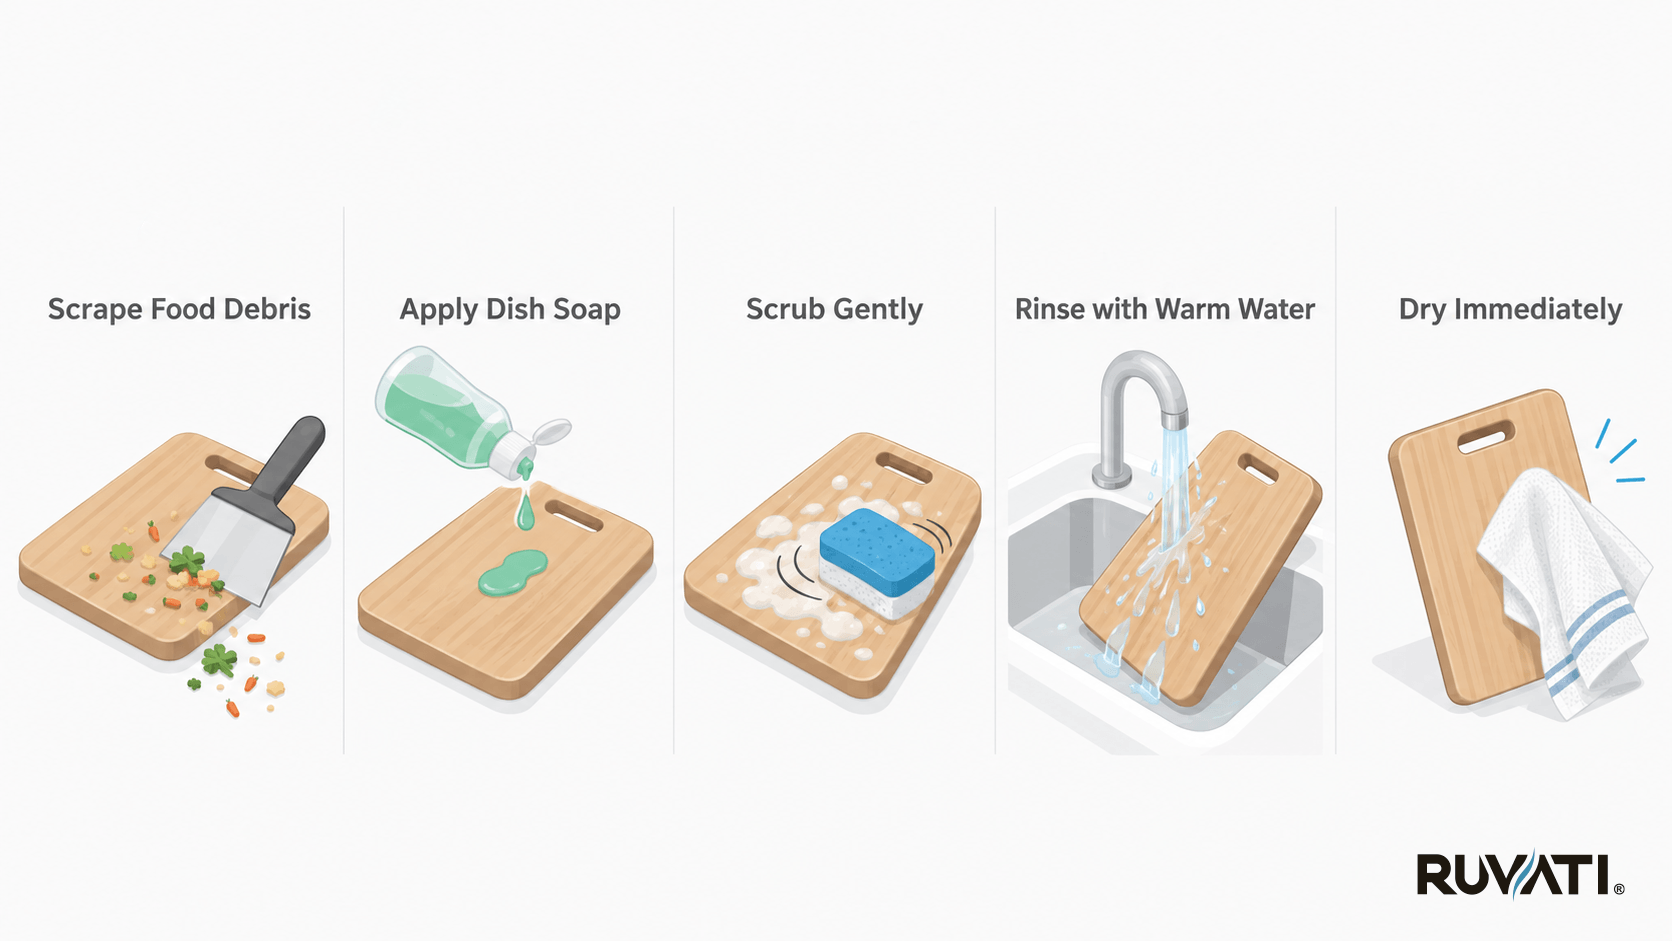
- Scrape off any visible food debris using a bench scraper, spatula, or the back of a knife.
- Get into the grooves and corners where bits of garlic, herbs, or meat tend to hide.
- If there’s sticky residue from honey, sauces, or fruit juice, use a damp cloth to wipe it away before washing. This prevents the debris from turning into a paste when you add soap and water.
- Give the board a quick rinse under warm water to loosen anything that’s stuck. Don’t soak it; just a quick pass under the tap to soften dried-on bits.
Now you’re ready to actually clean it.
Soap & Water: The Standard Approach
This is your default. After cutting vegetables, bread, cheese, or cooked meat, soap and water is all you need. It’s fast, effective, and won’t damage the wood if you do it right.
Apply a few drops of dish soap to the board’s surface. Scrub both sides with a sponge or soft brush, paying attention to any grooves or knife marks where food might be hiding. Rinse thoroughly under warm water until all soap is gone. Leftover soap can seep into the wood and affect the taste of your food later.
Tips:
- Use warm water, not hot: Hot water can cause the wood to expand and crack over time.
- Scrub both sides: Even if you only cut on one side, bacteria and moisture can transfer to the other.
- Don’t let soap sit: Wash and rinse quickly so the soap doesn’t soak into the grain.
- Skip the dishwasher: The heat and prolonged water exposure will warp and crack your board.
- Dry immediately after rinsing: Don’t leave it sitting in the sink or on the counter while wet.
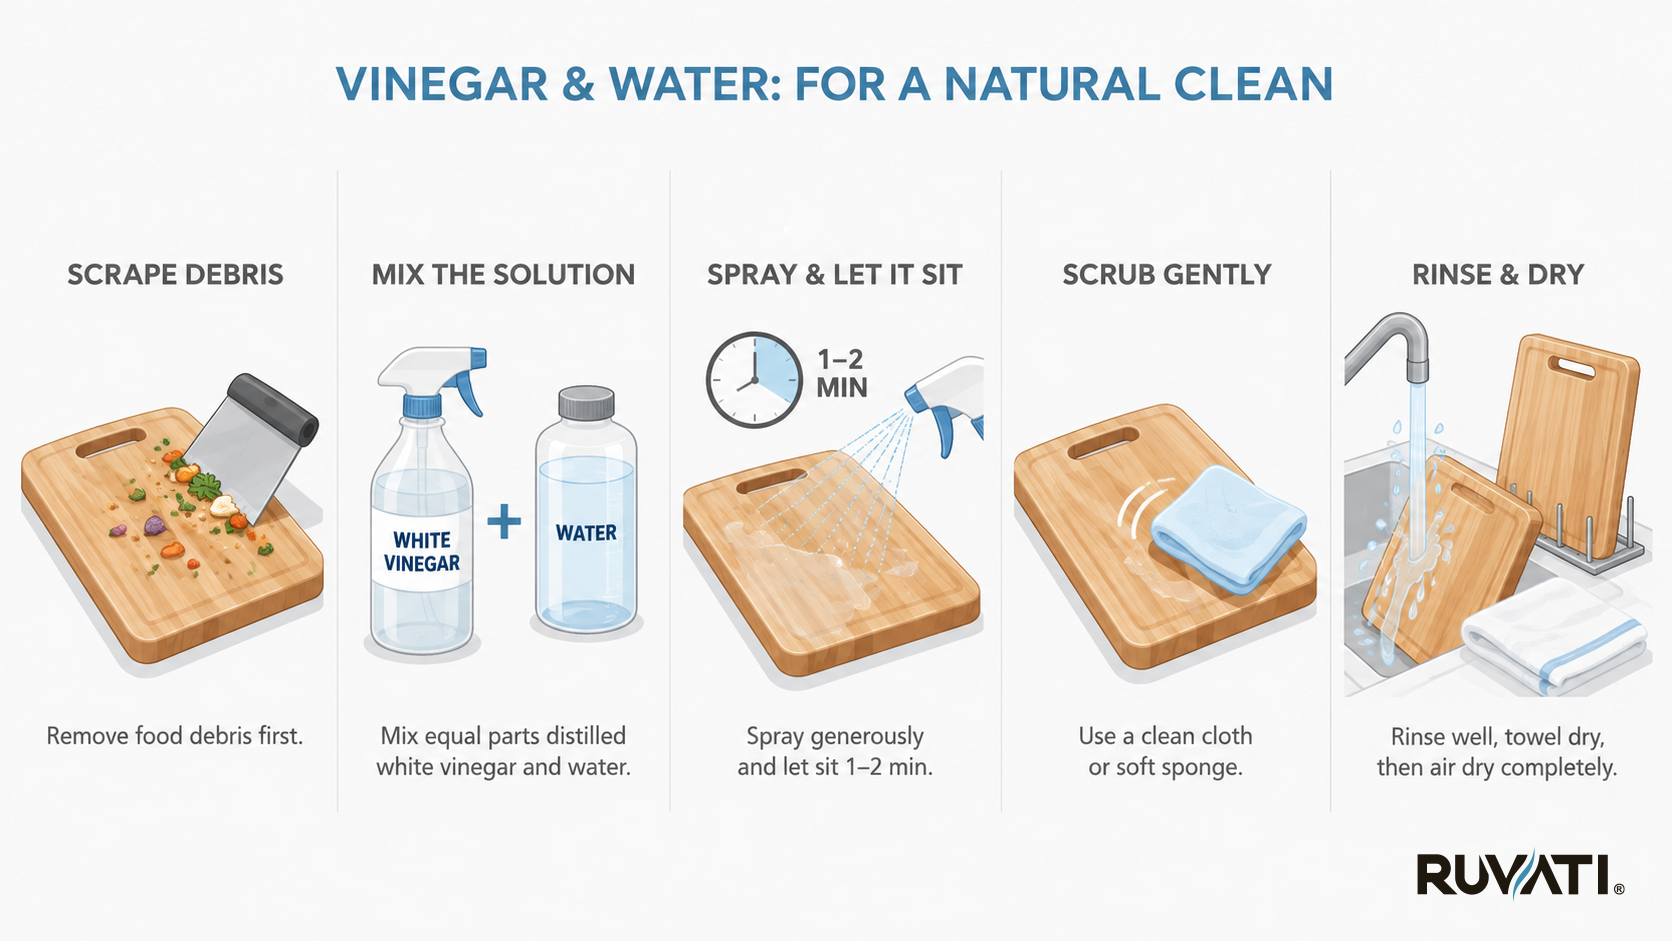
Vinegar & Water: For a Natural Clean
If you’re not a fan of dish soap or want something with mild antibacterial properties, vinegar works. It won’t kill everything, but it’s good for light sanitizing after everyday use. Mix equal parts distilled white vinegar and water in a spray bottle.
Spray the solution generously over the board’s surface after scraping off food debris. Let it sit for a minute or two, then scrub gently with a clean cloth or sponge. Rinse thoroughly under warm water to remove the vinegar smell and any loosened particles. Pat dry with a towel and let it air dry completely before storing.
Tips:
- Use distilled white vinegar, not apple cider vinegar: White vinegar has a higher acidity and doesn’t leave stains or sticky residue.
- Let it sit before scrubbing: Giving the vinegar a minute to work helps break down oils and light bacteria.
- Rinse thoroughly: If you skip this step, your next meal might taste like salad dressing.
- Don’t rely on vinegar for raw meat cleanup: It’s not strong enough to kill all harmful bacteria from poultry or red meat.
- Reapply if the board smells: Vinegar neutralizes odors, so a second pass helps with lingering garlic or onion smells.
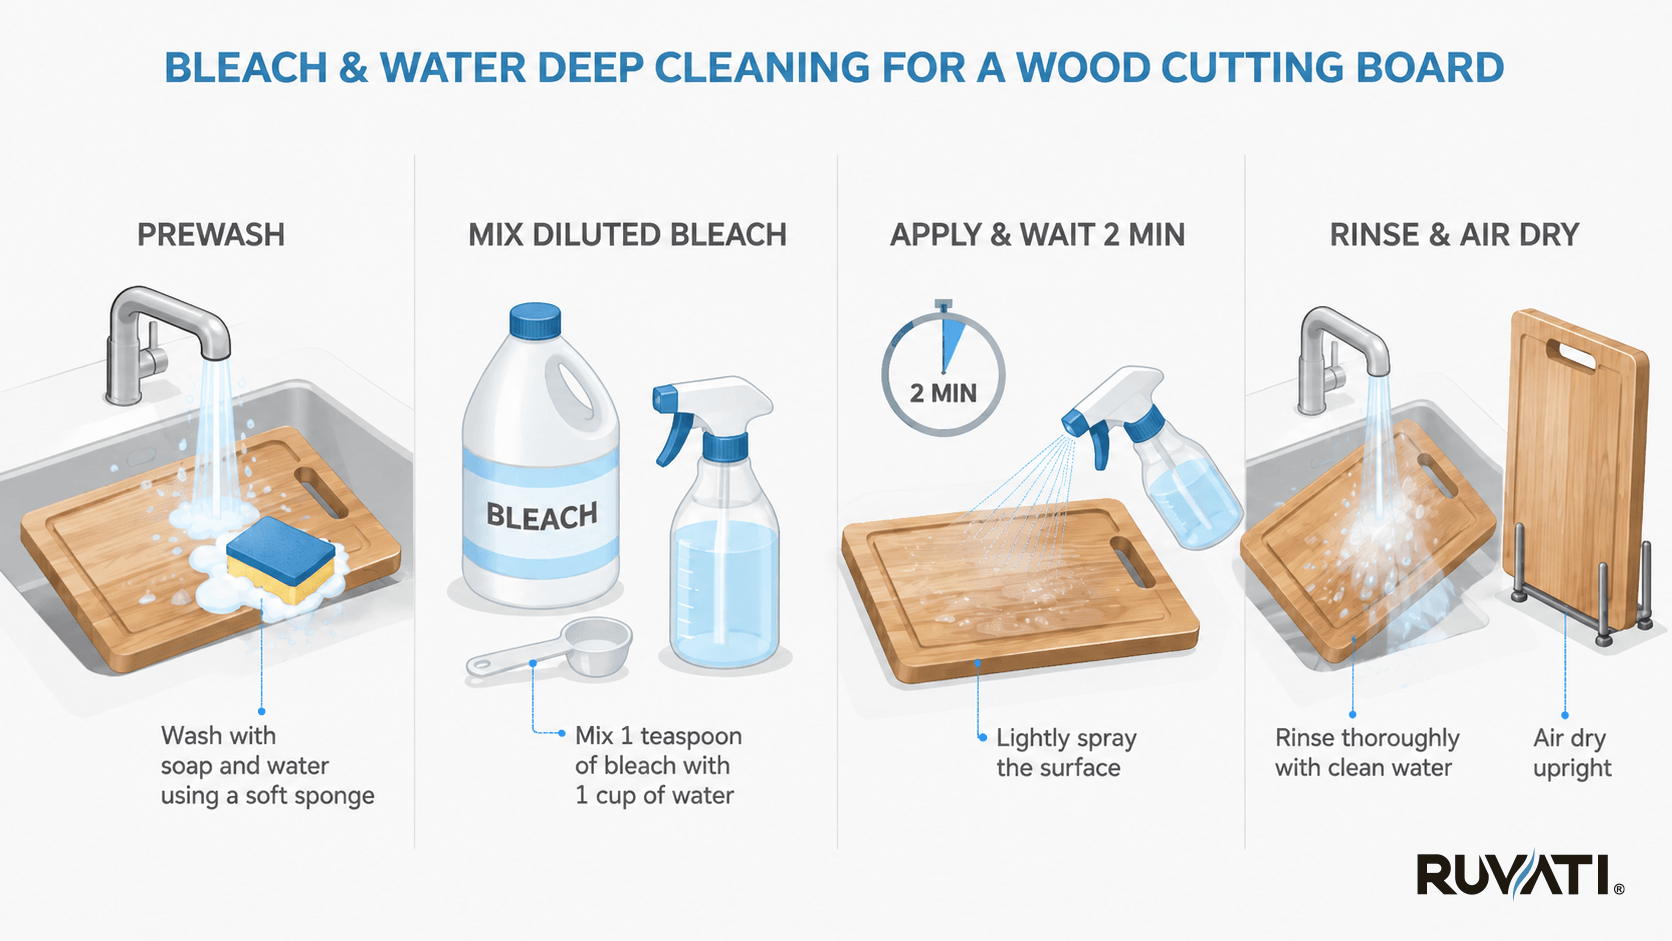
Bleach & Water: For Deep Cleaning
This is the heavy-duty option. Use it after cutting raw chicken or beef…basically anything that could carry salmonella, or other nasty bacteria. Bleach is the only household cleaner that actually kills these pathogens on contact.
Mix two teaspoons of chlorine bleach with one gallon of water. Prewash the board with soap and water first to remove visible grime. Pour or spray the bleach solution over the board and let it sit for two minutes. Don’t scrub during this time. Just let the bleach do its job. After two minutes, rinse the board thoroughly with hot water until there’s no bleach smell left. Air dry completely before using again.
Tips:
- Always prewash with soap first: Bleach doesn’t clean. It disinfects. You need to remove food and grease before applying it.
- Don’t soak the board in bleach: Two minutes of contact is enough. Longer exposure can dry out and damage the wood.
- Use chlorine bleach, not oxygen bleach: Oxygen bleach (like OxiClean) won’t sanitize effectively.
- Rinse until the smell is gone: Any lingering bleach can transfer to your food and make you sick.
- Ventilate the area: Bleach fumes are harsh. Open a window or turn on a fan while you’re working.
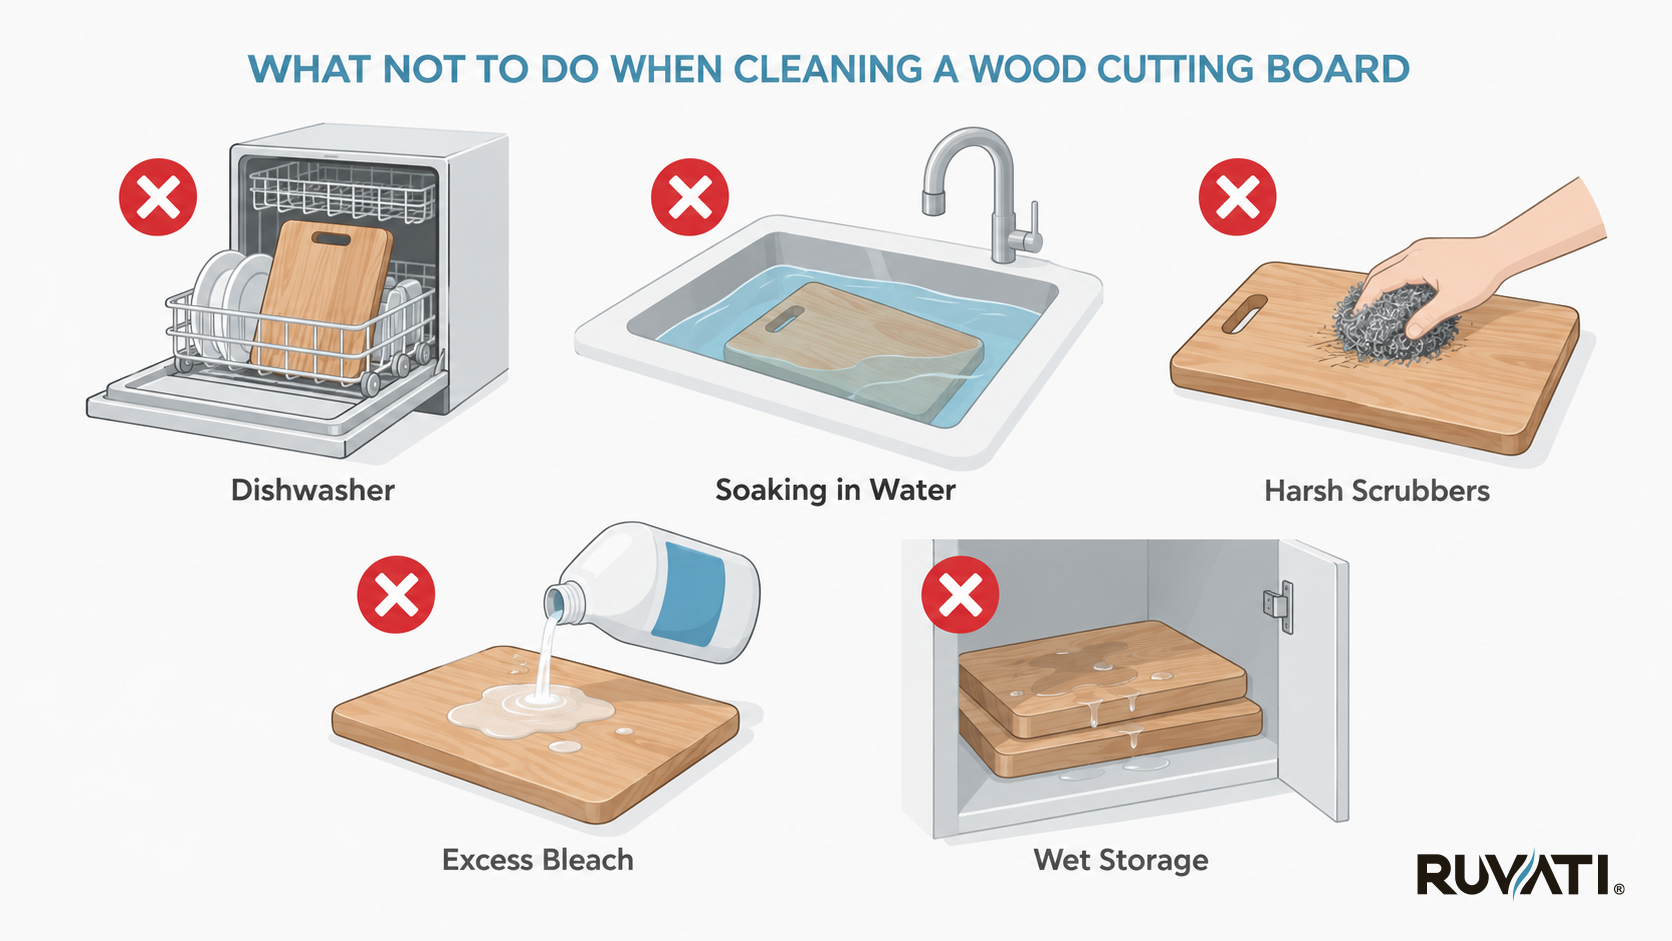
What Never to Do When Cleaning a Wooden Cutting Board
Some cleaning methods seem logical, but they will wreck your board faster than daily use ever could. Avoid these mistakes, and your board will last years longer.
Never put it in the dishwasher. The heat, prolonged water exposure, and harsh detergents cause warping, cracking, and stripped wood fibers. Even one cycle can ruin a board that took years to break in properly.
Never soak it in water. Submerging a wooden board causes it to absorb too much moisture, which leads to swelling, warping, and eventual cracking. A quick rinse is fine. Leaving it in a sink full of water is not.
Never use harsh detergents or abrasive scrubbers. Steel wool, scouring pads, and heavy-duty degreasers strip the wood’s natural oils and scratch the surface. These scratches create deeper grooves where bacteria can hide.
Never use excessive bleach or let it sit too long. More bleach doesn’t mean cleaner; it just means dryer, more brittle wood. Stick to the two-minute rule and always dilute properly.
Never skip drying. Leaving a board wet invites mold, mildew, and bacterial growth. It also accelerates cracking and warping. Dry it immediately after washing, every time.
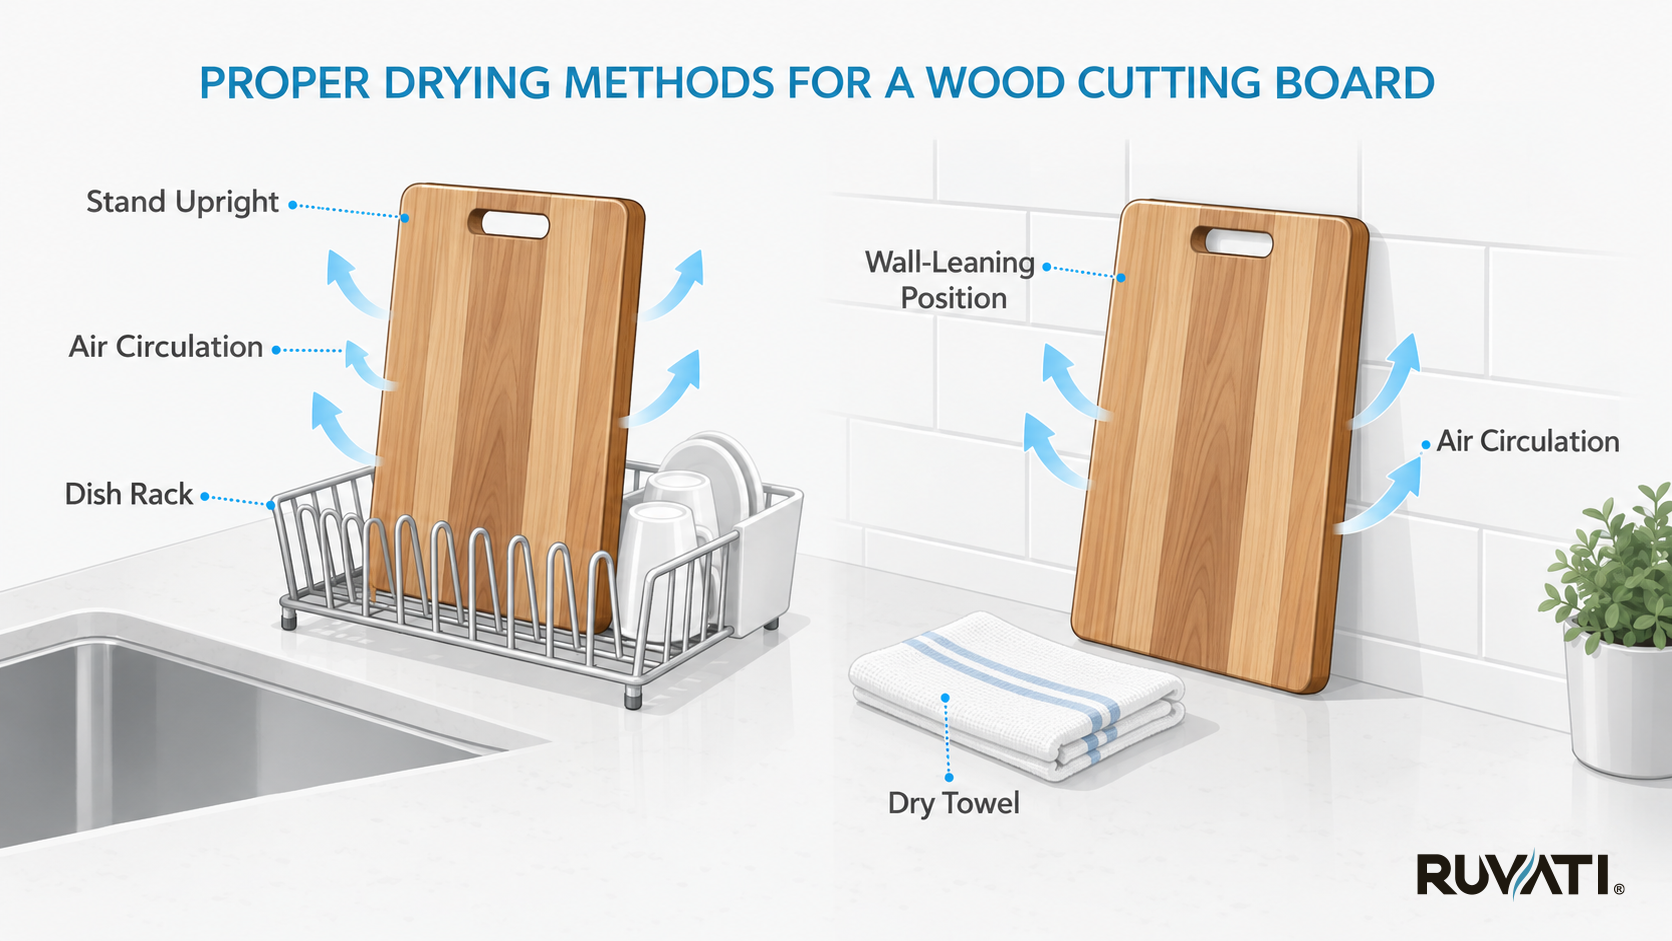
Proper Drying Methods After Washing
Drying your board correctly is just as important as washing it. A wet board is a breeding ground for bacteria and mold, and trapped moisture is what causes cracks and warping over time. Don’t skip this step.
After rinsing, use a clean dish towel to pat the board dry on both sides. Get into the grooves and edges where water tends to pool. Once you’ve towel-dried it, stand the board upright in a dish rack or lean it against the wall so air can circulate around all sides. This prevents moisture from getting trapped underneath, which is what causes mildew and that sour smell you sometimes notice on boards that haven’t been dried properly.
Let it air dry completely before putting it away. Depending on the humidity in your kitchen, this can take anywhere from 30 minutes to a few hours. If you store it while it’s still damp, you’re asking for problems.
Tips:
- Always dry both sides, even if you only washed one: Moisture transfers through the wood and can cause uneven swelling.
- Stand it upright, don’t lay it flat: Laying it flat traps moisture on one side and prevents airflow.
- Use a dry towel, not a damp one: Sounds obvious, but people reuse wet towels and wonder why their board stays damp.
- Don’t store it in a closed cabinet while wet: If you need to put it away quickly, at least leave the cabinet door cracked for airflow.
- Check the edges and handle: These areas hold water longer than flat surfaces and are often overlooked during drying.
Wrapping Up
And that’s pretty much it. Keeping your cutting board clean requires effort; there’s no doubt about that. But that effort can pay off quite a bit in the long term.
If you know what you have to do and what products you have to use, etc., you can work smart instead of working hard. That is what this post was about: educating you about the right ways and methods to wash your cutting board that you can apply without making it a burden on yourself.